I brewed yesterday. I wasn't completely organized so it took 6hrs instead of my target 5 hours. It's not like you're completely tied to the process for 6hrs; there are two 1-hour stretches where you set a timer and walk away. For the rest of the time it's basically cleaning whenever your direct attention is not required.
There is a saying: "If you like washing dishes you're going to
love homebrewing". :-) It becomes second nature.
I took crappy pics with my two-generations-back smartphone. Hopefully you can get the gist.
Ok, so brewday begins. Most people buy their yeast instead of ranching it so many people will begin here. This will be an "all grain" brew which means there are no extracts or sugars added to the batch. It's made from 100% whole grains the way God intended. I'll give you a heads up on where extract brewers would start the process.
Preparing for the Mash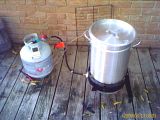
The first step will be the
mash.[0] This is a process of soaking malted grains (generally barley) in water at a given temp[s] for a given time[s]. It activates enzymes in the grains themselves that convert their grain starches into sugars. Literally, nothing is added but water. The grain
wants to be beer and the brewers job is to facilitate that process.
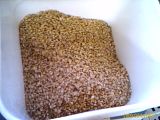
Here's what we are going to need for the mash: hot water (pic above of water heating on a turkey frier), milled grains, and a place to hold the mash at the proper temp. The pic to the right is about 9# of two-row[1] malted barley and about 1# of flaked wheat. See the recipe in the next post for details.
The mash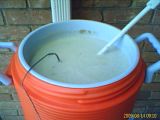
This recipe calls for the mash to be held at 153F for 60mins. During this period the mash looks like a thick, cloudy grain soup. If you taste it in the beginning it will be starchy, maybe biscuity tasting. As the enzymes start breaking down long starch changes into shorter sugar chains the converted liquid (now called wort) tastes sweet. Like malt.[2]
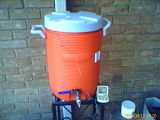
Once the temp is stabilized at the target temp the lid goes on and the 60min timer is set. Note the digital temp probe snaking out of the cooler. That way you can monitor temps without having to open it up. The coolers are so well insulated that it is common to lose only about .5F during the hour-long mash.
During the mash another pot of water has been heating up for the next step.
The sparge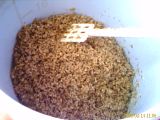
After the mash is done you've got a truckload of wet grains soaking in sweet liquid (wort, remember). How to get it out? I'll be using a
batch sparge technique.
The "first runnnings" are drained off into the brewkettle using the spigot you see in the pic above. Then the spigot is closed and some hot water is added. Stir, wait, drain. Repeat.
At the end of the three drainings most (like 95%) of the sugars have been rinsed off and you are left with husks, or
spent grains. It's just husk material because the white starchy insides have been converted to sugars then rinsed away. The husks are great for making dog biscuits or added fiber for bread or other foods. I usually add 1/3rd cup of the grains to the bread machine when it makes the "additions" beep. The rest goes in the compost pile.
Just brew it!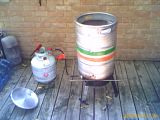
Brewing = boiling. We loosely call the overall procedure brewing but this is brewing proper.
BN: this is where
extract brewing would start. You add water and malt extract to the pot instead of converting it from grains like we did. On this brewday we did it from scratch (grains). Why would be take the extra couple of hours to do it from scratch? It offers much more control and drops the cost considerably. Plus it's rewarding to do it the way people have done it for millenia. Most new brewers start with extract, and many stick with extract and make fine beers with it.
"What the... ", you might say, "that kettle looks just like a keg". And you would be right. This is called a keggle[3], a keg converted to a kettle by dissassembling the tap fitting and cutting a 12" hole in the top (with a plasma cutter, in this case). Why? Because brewing takes a big pot. A keg is about 15gal which is generous. A commerical 15gal stainless pot is north of $300. A keg (also stainless) is about $50 off craigslist. They can be dented and ugly and generally unfit for selling beer but work great as keggles.
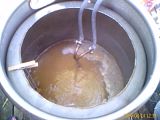
After a 60min boil the wort is force cooled to
pitching temperature, the temperature at which you want to toss in your yeasties. Normally this is around 60-65F. This particular yeast likes it unusually hot, so we will pitch around 80F.
In this pic you can see a copper coil lowered into the still-boiling wort; the tubes connect to a garden hose. (You can also see a clothespin that is anchoring a hop bag. The hops are in the bag so you don't have to strain/fish them out later). Tap water flows through the coil, wicking heat out of the hot liquid. When groundwater is 80F like it is now this will get the wort down to about 100F fairly quickly. The heated water comes out the other end of the clear hose and is used in the washing machine, or cooled and used to fill up the birdbath or water trees.[4]
Let's stop for a bit of meta-information. Up until now the brewer can play it fairly fast-and-loose since everything will be boiled. But after the wort cools below 140F
sanitation becomes the overwhelming priority. Everything from here on out is sanitized with no-rinse sanitizers derived from commercial breweries and/or dairies. Cross-contamination is the enemy. Although no human pathogens live in beer (ie, they can't make you sick) certain bugs can destroy the beer. There will be bugs in the beer (as with commercial beer) unless you brew in a NASA white room. The trick is to have your yeast so happy, so vigorous, and so numerous that they out-compete any non-yeast bugs. Microbial arms race.
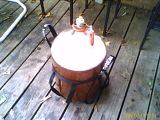
I tell you that in order to explain why there are no more pictures until the wort was in the sealed carboy fermenter with the yeast pitched in. It was just me on the porch so I did the work instead of taking pics.
For the next couple of weeks the yeast will eat the sugars in the wort, converting it to beer. It will have an airlock on it to release the CO2 that the yeast create while converting sugars to alcohol.
After fermentation is complete the beer will be kegged or bottled. It should be ready to sample about three weeks after that.
Thanks for following along. I know it's like watching somebody else's baby slobber while the parent fawns.
If you'd like a more organized look at brewing, see
Palmer's How To Brew website.
[0] Remember the term "sour mash whiskey"? Same concept only their mash is soured like sourdough in a controlled way. Bourbon makers take the resulting fermented corn-beer and distill it.
[1] Remember the Two-Rows brewpub? Now you know why it's named that.
[2] Now you know where malt flavoring comes from, like Malt-o-Meal, Malted Milk balls, or a chocolate malt. That's what the wort tastes like, only it's not concentrated the way the flavorings are.
[3] no direct relation to the popular pelvic exercise.
[4] The last bit of heat down to the final pitching temp is removed by a recirculating icewater system that uses the same coil. Didn't take pics of it and it and it's a little weird to explain.


